DbPRO may be configured to support multiple document types in one instance of the QSX. Since DbPRO's query is based on one or more document-level index field values, consideration should be given to the types of documents for which a lookup is desired.
A lookup will only be performed for documents with document types that have been configured for the specific instance of DbPRO.
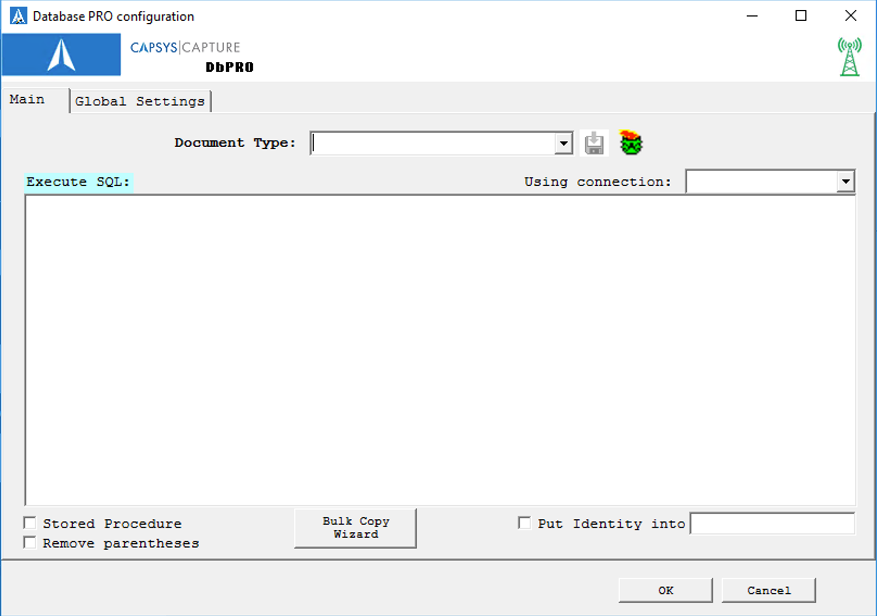
Initial Configuration Form
Figure 1 -DbPRO Initial Configuration Form
Tab Explanation
The Database Lookup configuration dialog may be displayed be right-clicking on the QSX icon and selecting the Configure... option from the context menu.
1. Configure Database Connection(s) (Global Settings tab)
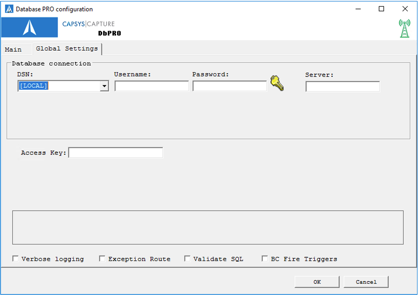
To create or configure the database connection, click on the Global Settings tab.
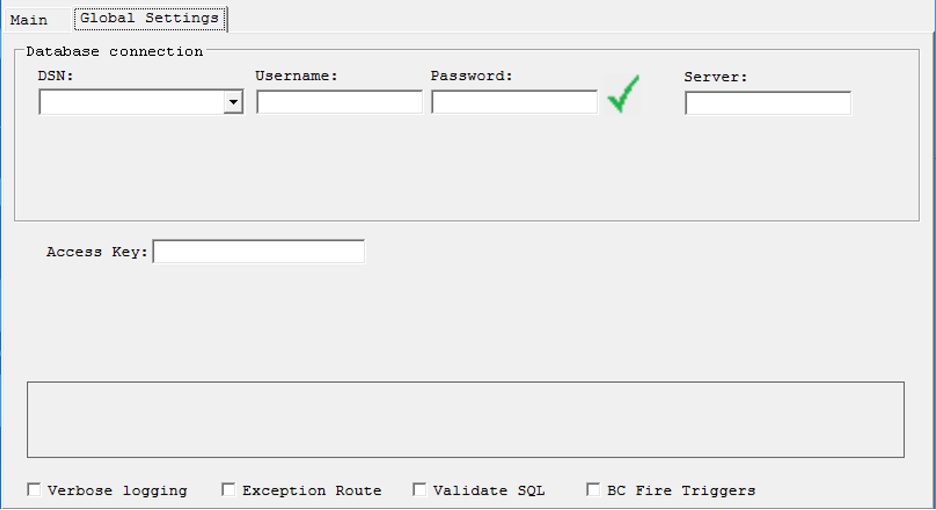
Figure 2 - Global Settings -> Database Settings Tab
Select a defined DSN by clicking on the (drop-down) immediately to the right of the DSN field. The drop-down should connect a list of potential DSNs including [Local] which is the CAPSYS database itself.
For any DSN (other than [Local]) you will need to provide valid Username & Password credentials. Then press the Key icon to validate the connection. Once validated the icon will change from Key to a green check-mark.
Repeat step 1 for every Document Type/DSN you require for the T-SQL that you will be creating/using for DB Reads/Writes.
2. Select Document Type (Main tab)
All configuration settings apply to a specific document type, including the database connection. This provides the greatest flexibility, even allowing queries to be made on different databases for different document types. Select the desired document type from the Document Type drop-down.
In this example Document Type ‘Invoice Demo DT’ is selected.
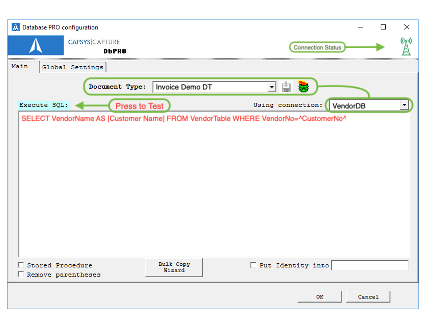
Figure 3 - Document Type Settings
3. Select Using connection
During Step 1 Configure Database Connection(s), DSN(s) to be used would have been supplied with proper credentials and tested, doing so would enable said DSN(s) for use.
Select a DSN to be used for this Document Type. In the above example Using connection is set to ‘VendorDB’.
4. Build your T-SQL statement
In the text box under the ‘Execute SQL’ is where you would enter a valid T-SQL statement. In the example above the SQL is coded to retrieve the Vendor Name from a table named VendorTable using VendorNo (Vendor Number) as the retrieval key.
Specific CAPSYS notation is as follows.
ie: Document Type=Invoice Demo DT has 6 fields;
Invoice No = 12345
Invoice Date = 07/10/2025
PO Number = A251020
Total = 505.15
CustomerNo = 10012
Customer Name =
Using the T-SQL statement from above as the example select, before the T-SQL statement is executed, it is modified by DbPRO to become;
SELECT VendorName AS [Customer Name] FROM VendorTable WHERE VendorNO=10012
After the SQL statement is executed, the returned value for VendorName is copied into the CAPSYS Field named CAPSYSVendorName
5. Execute SQL
Is not just a descriptive label, it is also a command button. After entering your T-SQL command in the box provided below the ‘Execute SQL’ label, click on ‘Execute SQL’ to test your T-SQL script.
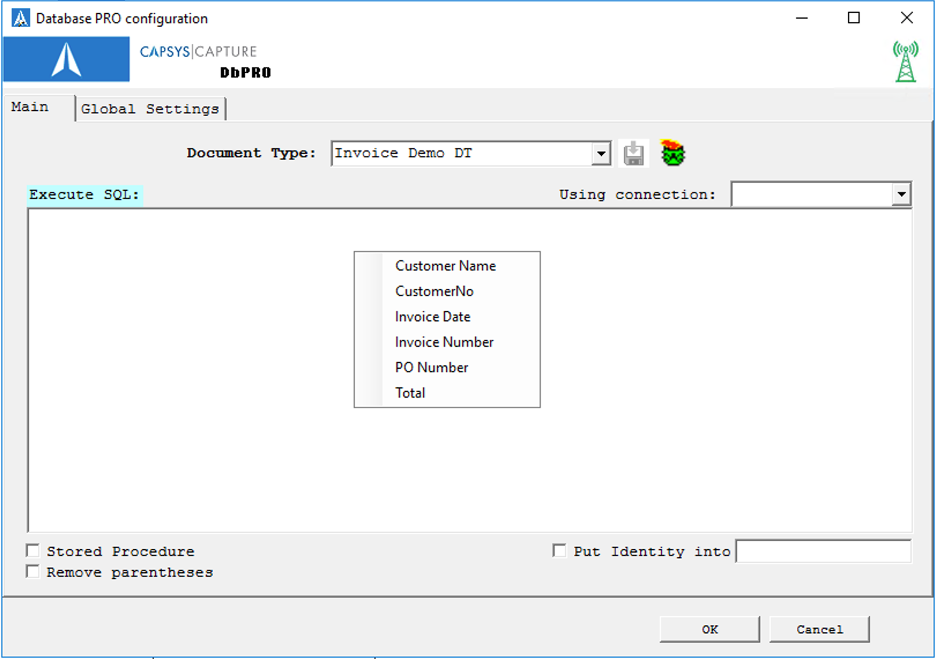
Additional configuration features are available and are described below the following illustration:
6. Testing your SQL script.
6.1 On the ‘Main tab’ press ‘Execute SQL:’ (Review [Figure 3] above)
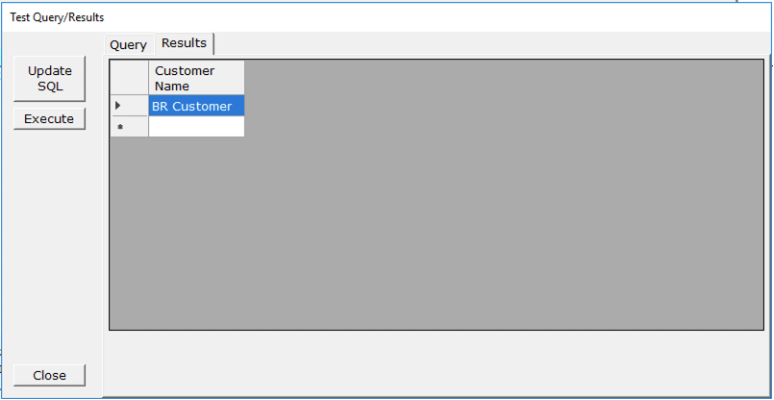
The ‘Test Query/Results’ form will be opened.
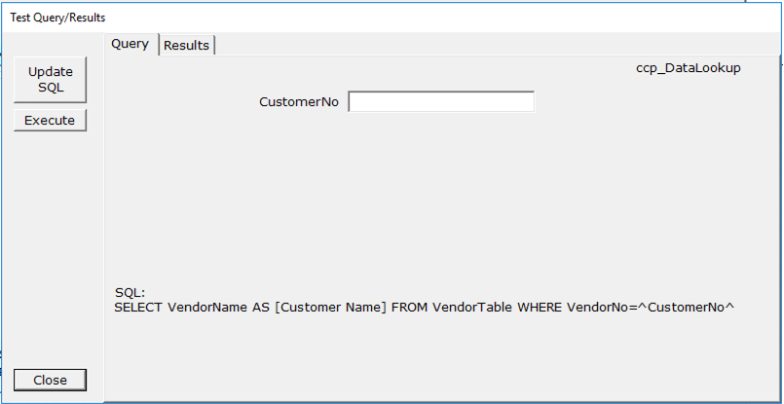
6.2 Enter values into your defined “Input” fields (described earlier).
6.3 Press ‘Update SQL’ button.

6.4 Press ‘Execute’ button and if corresponding data is found it will be presented on the ‘Results’ tab