The Redaction features in CAPSYS CAPTURE require additional licensing and user permissions, and may not be available with your login account. If the Redact Panel is not visible with your login account, check with your system administrator to obtain the necessary license or permissions in order to gain access.
CAPSYS Redact works within the CAPSYS CAPTURE Web Client framework, and is accessible from the Redact Panel in the CAPSYS Client based on available licenses and user rights.
Note: CAPSYS Redact works with TIFF image formats only. Redactions made to images using this tool are permanent and cannot be undone.
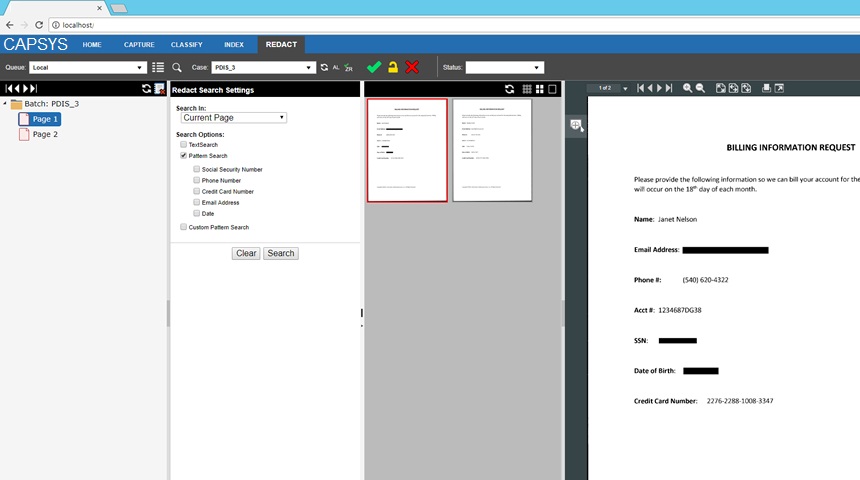
Select the Redact Panel in the CAPSYS Web Client. Select a case to work (redact) from the queue list. Select the desired search options in the Search Settings area. Searches can be performed in a single page, across a document, a group of documents or an entire batch. Search criteria can be a combination of operator supplied text, pre-defined private data patterns, or a custom pattern. When the Search button is clicked, CAPSYS Redact will search through the specified grouping to find all redaction targets that match the search criteria.
SEARCH CRITERIA
Social Security Number
Phone Number
Credit Card Number
Email Address
Date
Custom Pattern Search – The Search function will search for any text in the specified grouping that matches the pattern specified in this field. In this case the search engine is looking for a match to the pattern represented by a unique combination of letters, numbers and special characters (###-##-#### as an example of a social security number).
Figure 1 - Redact Panel Search Criteria
After the Search Button is clicked, the redaction targets that match the Search criteria are displayed in the results window beside the first page in the specified grouping. Each redaction target is listed in the results window, and highlighted on the corresponding page in the viewer window. Each redaction target in the list also has a check box to allow for quick de-selection of targets that are false positives, or that, in the operator’s discretion, do not need to be redacted.
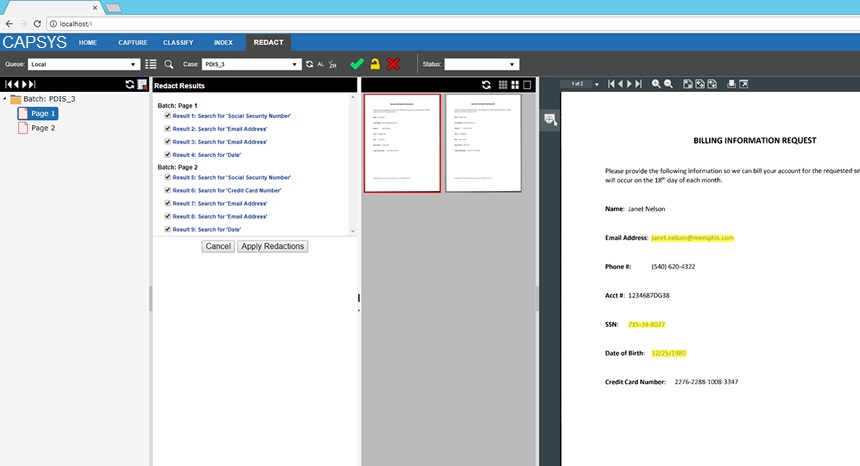
Figure 2 - Redaction Search Results
Clicking on a Redaction Target in the Redaction Results list will cause the corresponding highlighted target in the viewer to be automatically zoomed for easier inspection.
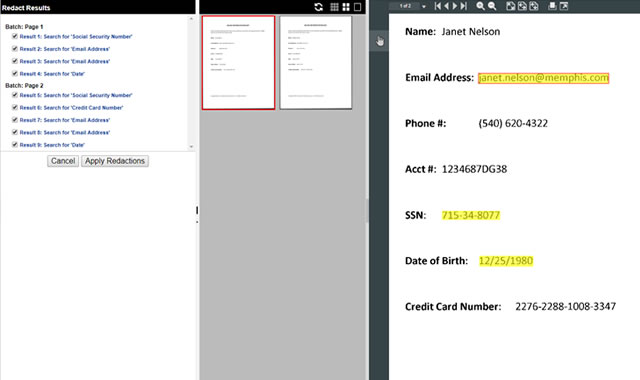
Figure 3 - Redaction Target Inspection
Once all targets are verified, the operator can click on the Apply Redactions button to cause all the accepted redaction targets to become permanent.
Figure 4 - Redactions Applied
A Manual Redaction can be added to a page or document at any time using the Redaction Tool on the Viewer's flyout toolbar. Select the Redact Tool and use the mouse to draw a redaction over the area of the image you wish to redact.
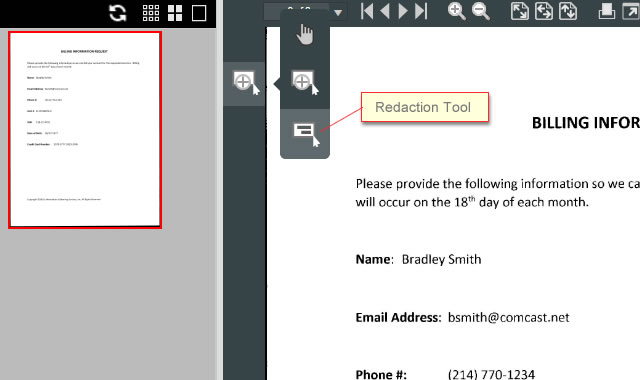
Figure 5 - Viewer Toolbar, Redaction Tool
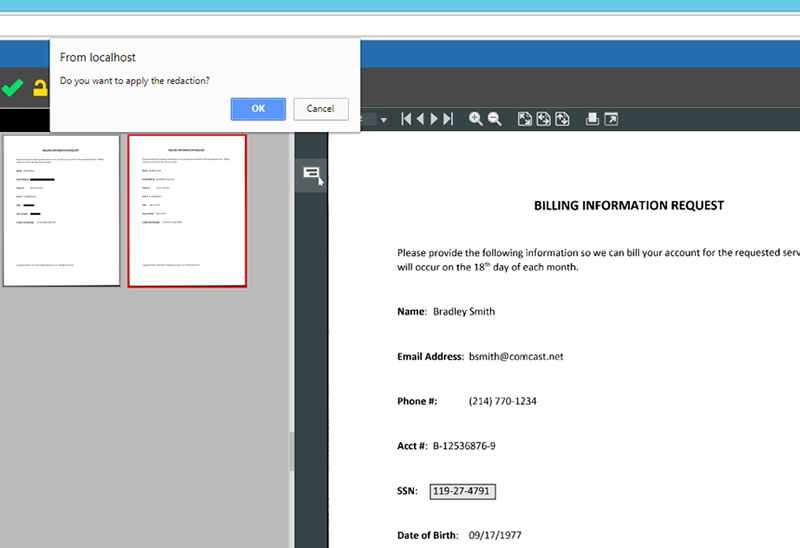
Figure 6 - Manual Redaction