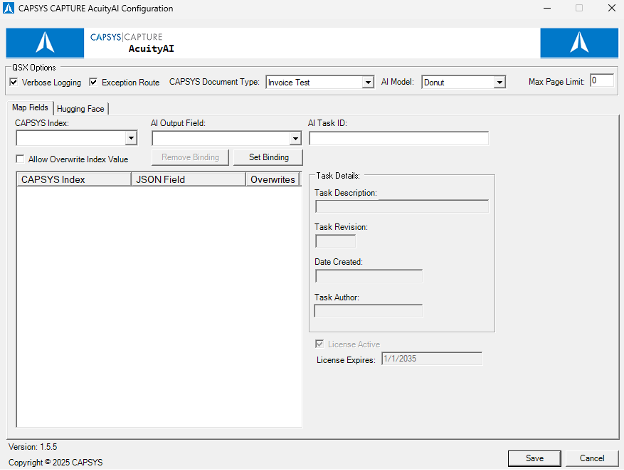
After an AI Model is selected, the “Map Fields” tab will appear along with a tab corresponding to the model you have selected.
It is recommended that the first thing you do on this tab is verify that your AcuityAI license is valid towards the bottom right side of the window.
With a valid license, you can now set the “AI Task ID”. This field will be populated with the ID for the task generated by the AcuityAI Instruction Creator application that is installed alongside AcuityAI. A valid instruction ID will populate the Task Details with information about the instruction, and the instruction will be sent along with the documents to the AI model.
With a valid instruction set, you may now begin mapping the model’s output to CAPSYS indexes. If the instruction contains valid JSON formatting, the keys will appear in the “AI Output Field” dropdown. If there are no choices, you can simply type the JSON key in the field manually, but you must ensure it matches the spelling of the key in the set instructions. Next, select the CAPSYS index you would like to put the AI’s output for that key into. If desired, you may also check the “Allow Overwrite Index Value” box which will overwrite any existing index value with the model’s output. Once you have finished filling out the two fields, press the “Set Binding” button to add it to the list. Repeat for all of the desired mappings.
If you would like to remove a mapping, simply click the mapping in the list and then select the “Remove Binding” button.
If you would like to edit a mapping, you can choose the CAPSYS index to edit and then adjust the AI Output Field before pressing “Set Binding”.